Your First Pixels: A Beginner's Guide to Creating with a Simple Pixel Art Grid
New to pixel art? 🎨 This guide demystifies the pixel art grid. Learn a simple 4-step workflow to create your first 8-bit masterpiece today!
The world of pixel art, with its charming retro aesthetic and nostalgic appeal, can seem intimidating to newcomers. You see intricate 8-bit landscapes and expressive characters and wonder, "Where do I even begin?" The answer is simpler than you think. The single most important tool in any pixel artist's toolkit is the pixel art grid. It's your foundational framework for making art, one square at a time.
This guide is designed to demystify the process. We will break down what a pixel art grid is, why it's your best friend, and provide a clear workflow to take you from a blank canvas to your first creation. Think of this as your foundational framework for making art, one square at a time, using a structured canvas.
What Exactly Is a Pixel Art Grid?
At its core, a pixel art grid is the digital canvas for your creation, a defined area of squares (pixels) where you place color. The magic of a pixel art grid lies in its simplicity and constraints. Unlike a traditional blank canvas that offers infinite possibilities, this structured canvas forces you to think in a blocky, deliberate way. This limitation is not a weakness; it's the very soul of pixel art.
A well-designed pixel art grid is specifically for accessibility. It provides a straightforward interface without overwhelming you with complex tools, so you can master the fundamentals of shape, color, and shading. Every great piece of pixel art you've ever admired was built on a framework just like this.
The Core Workflow: Using Your First Pixel Art Grid
Ready to create? This simple, four-step process can be applied to any subject. The goal is to build confidence through a structured workflow on your pixel art grid. Let's use a simple red apple as our example.
Step 1: Choose Your Canvas Size
Your first decision on any pixel art grid is setting its dimensions. Beginners should start small. A 16x16 or 32x32 pixel canvas is perfect. A smaller pixel art grid forces you to focus on the most important details of your subject. You'll be surprised at how much character you can convey in such a small space. For our apple, a 16x16 grid is perfect.
Step 2: Create the Outline
This is the skeleton of your artwork. Select a dark color (like black or dark gray) and begin placing pixels to form the main outline of your subject. Don't worry about perfection; focus on creating a recognizable silhouette. The rigid structure of the pixel art grid helps ensure your lines have that classic, crisp 8-bit feel. For our apple, we'll draw a simple, rounded shape and a small stem.
Step 3: Block in Base Colors
With your outline complete, it's time to add color. Choose a limited color palette (3-5 colors is ideal for a beginner). Fill in the different sections of your outline with your chosen base colors. This step is about defining the main color areas of your subject on the pixel art grid. For our apple, we'll fill the main body with a solid red and the stem with a brown.
Step 4: Add Shading and Highlights
This is where your creation comes to life. Pick a single light source (e.g., from the top-left). Add a slightly darker shade of your base color to the areas opposite the light source. Then, add a slightly lighter shade to the areas closest to the light source. The structure of a pixel art grid makes this process manageable, as you're only deciding which square gets which color. This simple technique adds depth and form to your pixelated art.
When to Use a Tool Instead of a Blank Grid
While the process of placing each pixel by hand is incredibly rewarding, it can also be time-consuming. What if you need inspiration, want to see how a complex photo translates to pixel art, or are looking for a shortcut to quickly generate assets?
This is where a different approach is needed. While drawing on a pixel art grid builds skill, tools like our Image2Pixel offer a powerful shortcut. It analyzes your photo and intelligently maps it onto a conceptual pixel art grid, giving you a professional-grade result in seconds. It's the perfect way to generate ideas or assets when you don't have time to start from a blank canvas. This method still teaches you how to think in pixels and can be a fantastic way to prepare a reference for your next hand-drawn project.
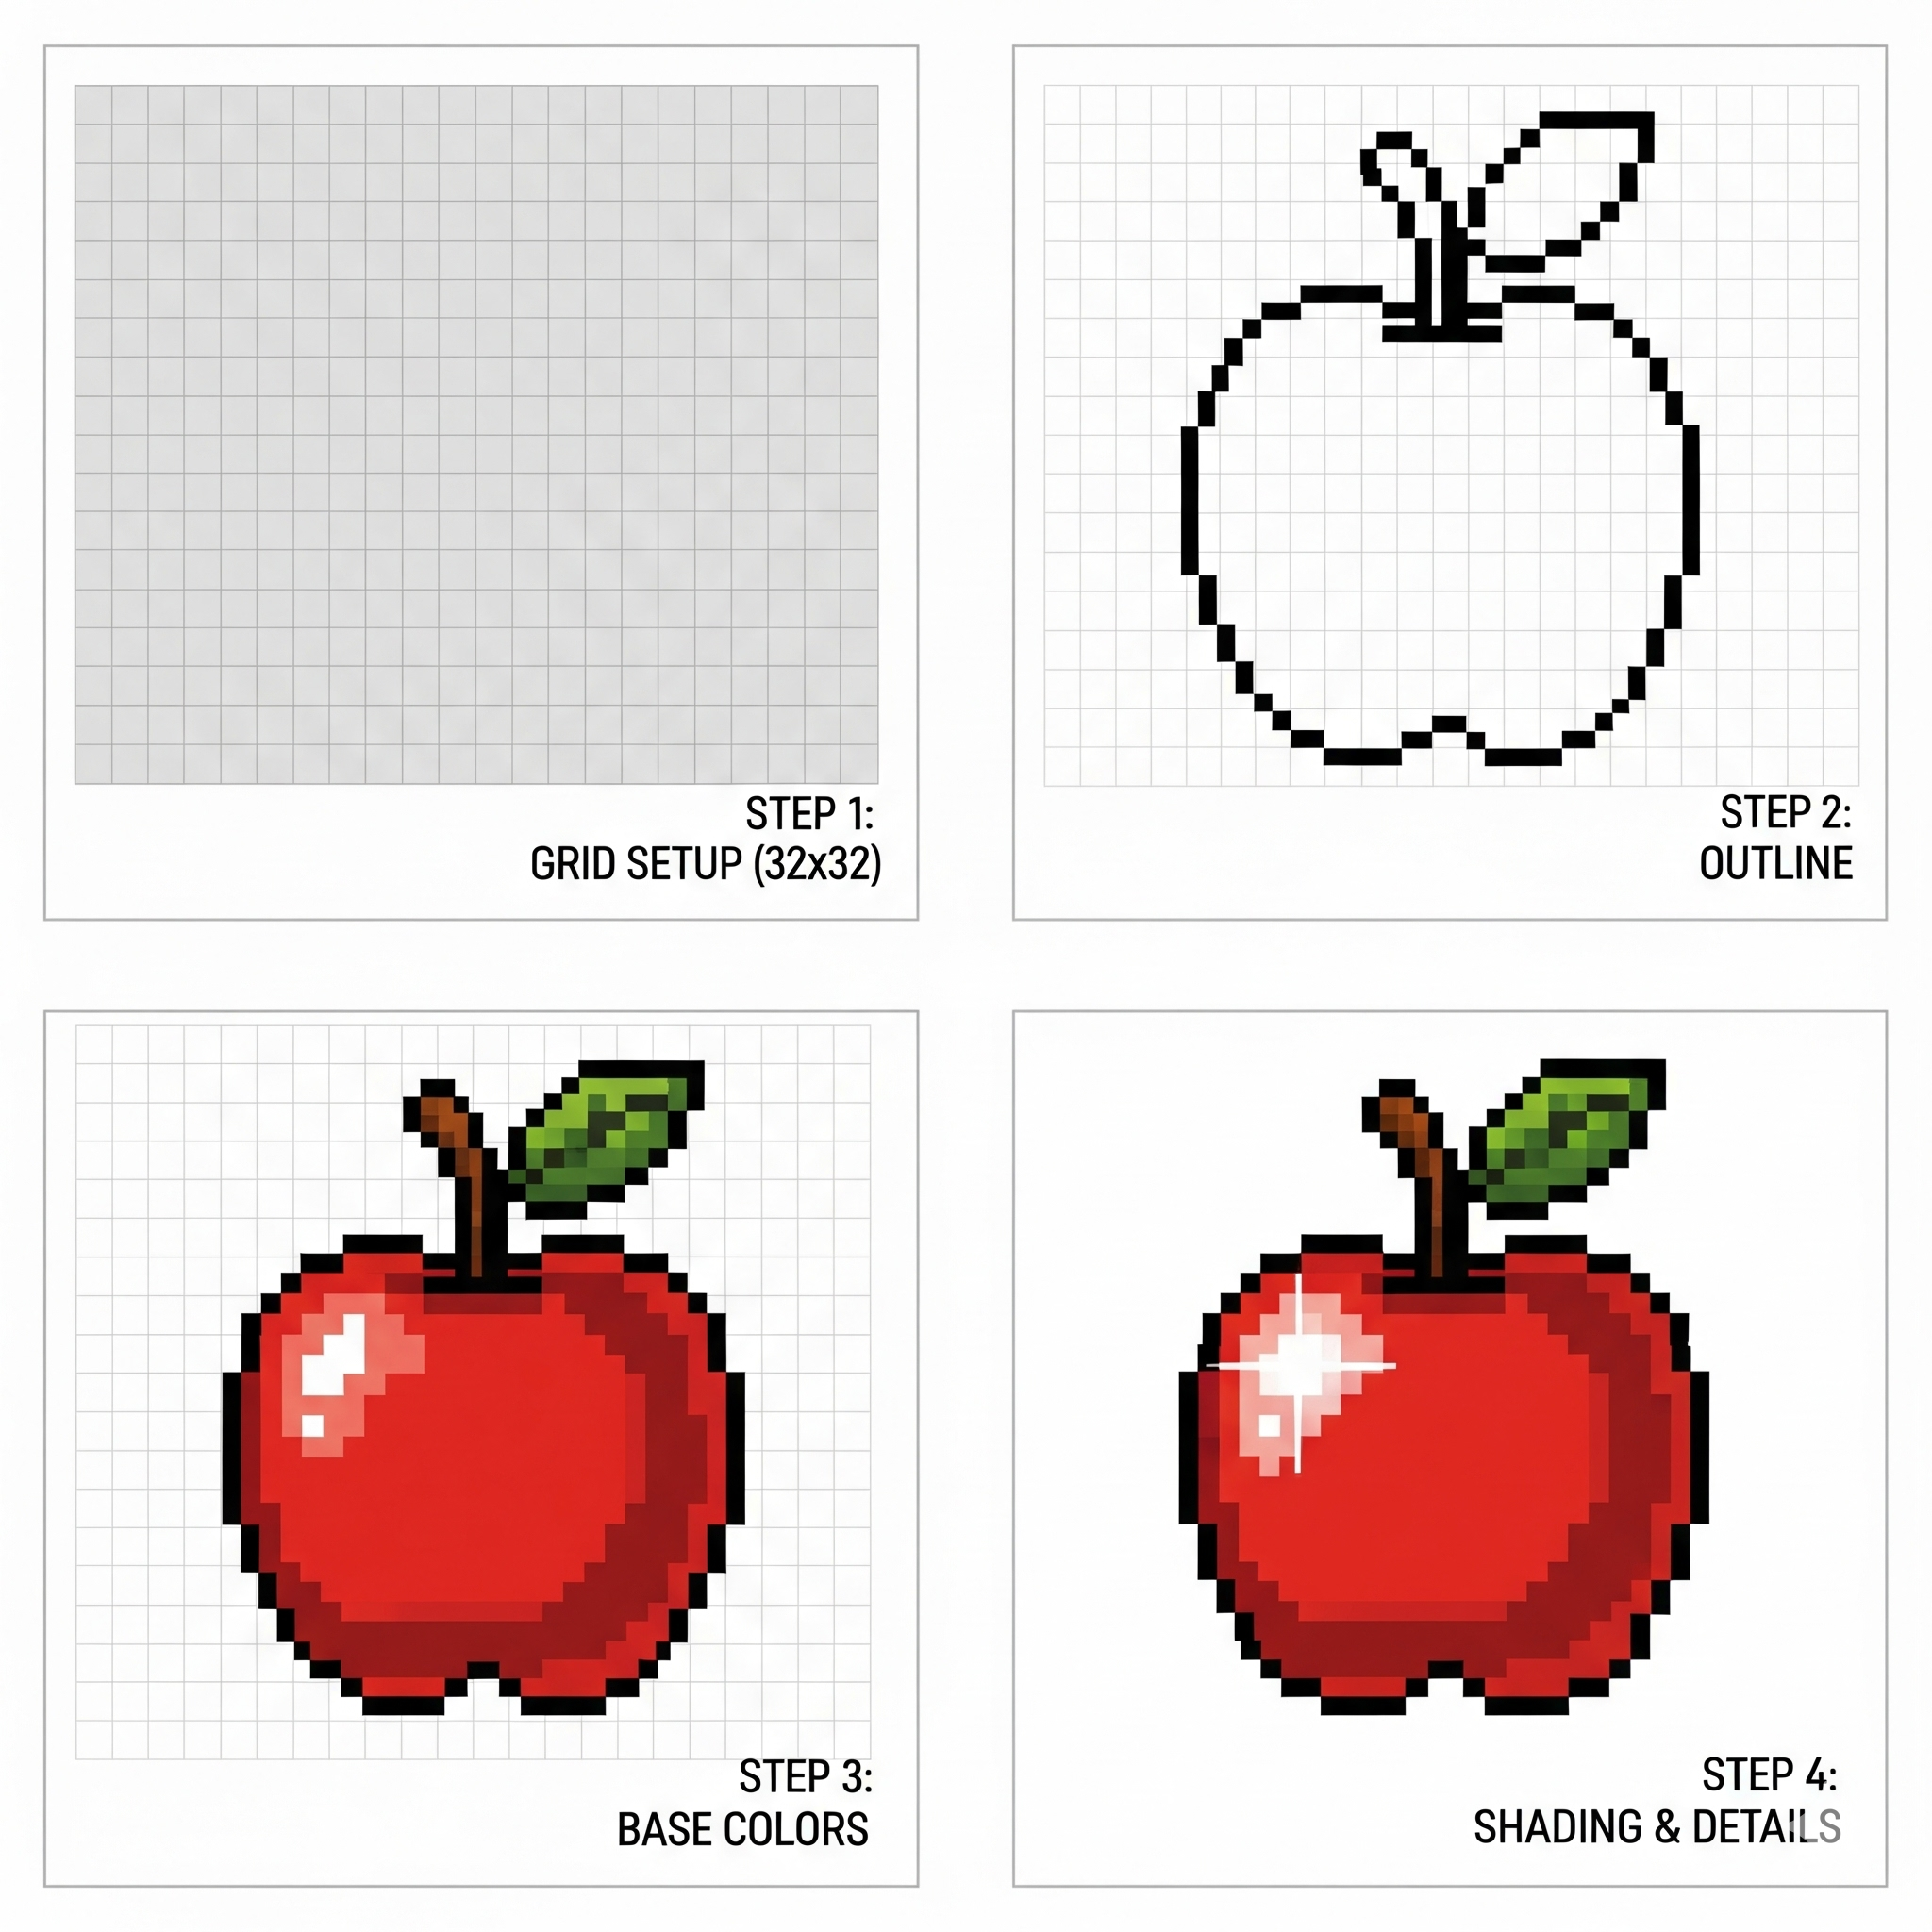
A four-panel image showing the apple at each stage of the workflow: 1. Blank grid with dimensions, 2. The black outline, 3. Base colors filled in, 4. Final image with shading and highlights.
Frequently Asked Questions (FAQ)
Q1: What's the best size for a pixel art grid if I'm a total beginner?
A: Start with a small 16x16 pixel art grid. It's the perfect size to learn the fundamentals of shape and shading without feeling overwhelmed by too many pixels.
Q2: How do I choose the right colors for my pixel art?
A: A limited color palette is key. For a beginner, use a tool like Lospec or a classic console color palette (like NES or Game Boy) for inspiration. The constraint of a limited palette on a pixel art grid forces you to make deliberate, effective color choices.
Q3: My lines look jagged. What am I doing wrong?
A: This is a common issue! Avoid drawing diagonal lines with single pixels. Instead, group them in pairs or threes to create a smoother, more deliberate line. The structure of the pixel art grid makes this technique easy to master.
Q4: Can I use a pixel art grid to make animations?
A: Absolutely! Animation is the next step. You create one frame on your pixel art grid, then duplicate it and make small changes for the next frame. Each frame is its own project on a pixel art grid.
Conclusion
The journey into pixel art begins with a single step: embracing the pixel art grid. It is not a limitation but an empowering framework that makes art accessible to everyone. By following the simple workflow and tips outlined above, you can move from spectator to creator. So open up your first pixel art canvas and place that first pixel. Your creative adventure awaits.